
Easy Cheeseburger Sliders
These baked cheeseburger sliders have the familiar burger combination—seasoned beef, melted cheese, pickles and a buttery sesame top—packed into one pull-apart tray. The filling stays juicy, but a few small moisture-control steps keep the bottoms of the rolls from turning soggy.
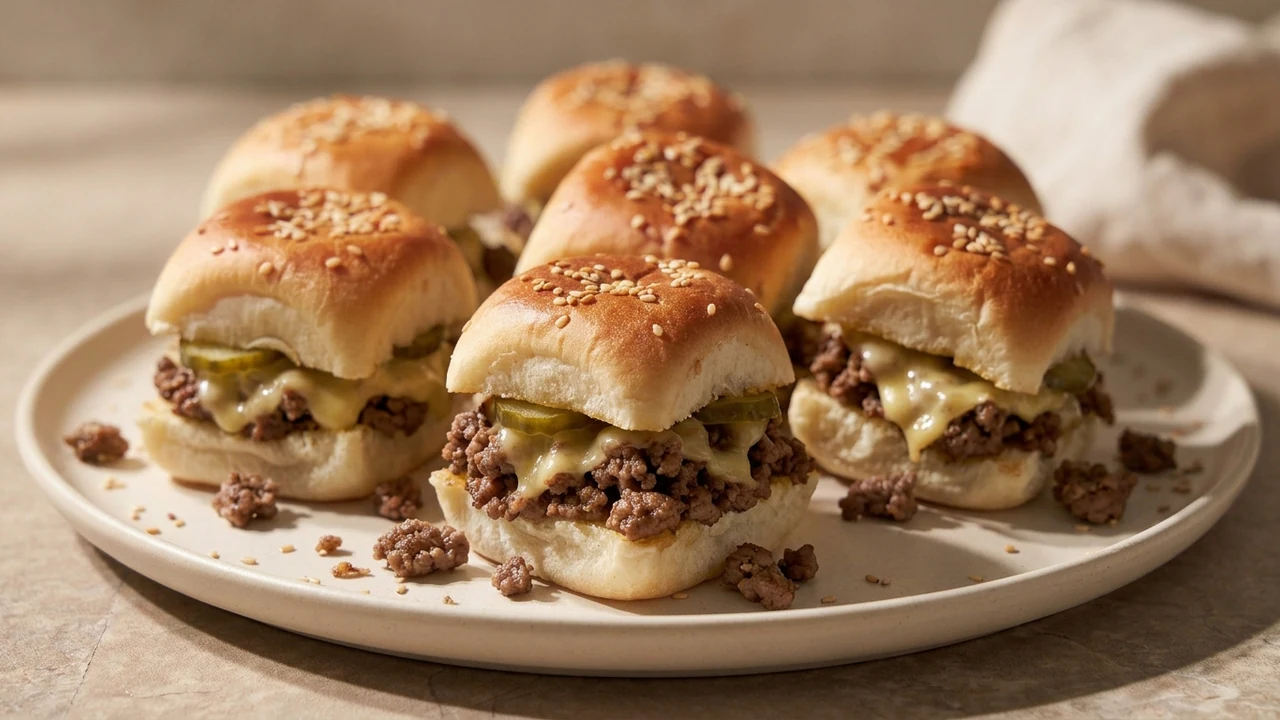
Ingredients You’ll Need
You only need familiar burger ingredients here, but a few choices make the sliders noticeably better.
- Ground beef. I recommend 85–90% lean. It has enough fat for a juicy filling without leaving so much grease that the rolls become heavy. The important part is draining the cooked beef well.
- Yellow onion. Finely diced onion cooks right alongside the beef, so there is no separate sautéing step and no large pieces falling out of the sliders.
- Worcestershire, ketchup and yellow mustard. These give the beef its burger-style seasoning. Cook them into the meat for a minute or two rather than leaving the filling loose and saucy.
- Hawaiian-style sweet rolls. Keep the slab connected. The soft, slightly sweet rolls are sturdy enough to slice horizontally and make the whole tray easy to assemble.
- Cheese. American gives the smoothest, most cohesive melt; cheddar has a sharper flavor. Both work. We use cheese below and above the beef so the sliders hold together and the lower layer also helps shield the bread from moisture.
- Dill pickles. Pat the slices dry before adding them. They provide the acidity a cheeseburger needs without bringing unnecessary brine into the bread.
- Butter and sesame seeds. Melted butter helps the roll tops brown and gives them that finished burger-bun look. Sesame seeds are optional.
Make party food easier.
Get practical recipes, useful swaps and seasonal ideas delivered to your inbox.
How to Make Cheeseburger Sliders
- Cook the beef and onion.
Add both to a large skillet over medium-high heat and break the beef into small crumbles as it cooks. Smaller pieces spread evenly across the rolls and make the finished sliders easier to separate. Once no pink remains, drain the excess fat thoroughly.
- Season the filling.
Add the salt, pepper, garlic powder, Worcestershire, ketchup and mustard. Cook for another 1–2 minutes. You want beef that looks juicy, not wet: drag a spoon through the pan and the liquid should not immediately flood back into the trail.
- Slice the rolls as one slab.
Use a serrated knife to cut horizontally through the connected rolls. Set the bottom slab in a lightly greased 9×13-inch baking dish. There is no need to separate 12 individual rolls.
- Layer the sliders.
Put half of the cheese over the bottom rolls, spread the beef evenly from edge to edge, add the patted-dry pickle slices, then finish with the remaining cheese. Replace the top slab of rolls.
- Butter and bake.
Brush the tops with melted butter and add sesame seeds if using. Bake at 350°F (175°C) for 12–15 minutes, until the cheese is completely melted and the tops are lightly golden. If the bread is browning before the cheese is ready, cover the pan loosely with foil.
- Rest, then cut.
Give the tray 3–5 minutes before cutting along the roll seams. That short rest lets the melted cheese settle around the filling instead of immediately pulling out with the knife.
How to Keep the Bottoms from Getting Soggy
The biggest risk with baked sliders is free moisture. Drain the beef after browning, cook the ketchup and mustard into the meat until there is no liquid pooling in the skillet, and blot the pickles. Then put the first layer of cheese directly on the bottom rolls before adding the beef. None of those steps is difficult, but together they make a much cleaner slider.
Make Ahead and Reheating
For a party, cook and season the beef up to 2 days ahead and refrigerate it in a covered container. Assemble the sliders shortly before baking. You can assemble them a few hours ahead and keep the covered pan refrigerated, but I would not leave the filled rolls overnight because the bread has more time to absorb moisture.
Reheat leftovers covered at 325°F (165°C) until hot. The microwave is quicker, but the rolls will be noticeably softer.
Useful Swaps
Connected soft dinner rolls can replace Hawaiian-style rolls if you prefer less sweetness. Ground turkey also works, although the filling will be leaner; avoid overcooking it and add a teaspoon or two of oil if it looks dry. Colby Jack is a good middle ground between mild-melting American and sharper cheddar.
Easy Cheeseburger Sliders
Seasoned beef, melty cheese and pickles tucked into soft sweet rolls with buttery sesame tops.
Ingredients
- 1 lb (454 g) ground beef, preferably 85–90% lean
- 1/2 small yellow onion, finely diced (about 1/2 cup / 75 g)
- 1/2 tsp kosher salt
- 1/4 tsp black pepper
- 1/2 tsp garlic powder
- 1 tbsp Worcestershire sauce
- 2 tbsp ketchup
- 1 tbsp yellow mustard
- 12 connected Hawaiian-style sweet rolls
- 6 slices cheddar or American cheese
- 12 dill pickle slices, patted dry
- 2 tbsp (28 g) unsalted butter, melted
- 1 tsp sesame seeds, optional
Instructions
- Heat oven to 350°F (175°C). Lightly grease a 9×13-inch (23×33 cm) baking dish.
- Add onion and beef to a large skillet over medium-high heat. Break into small crumbles and cook until no pink remains, about 6–8 minutes. Drain excess fat well.
- Stir in salt, pepper, garlic powder, Worcestershire, ketchup and mustard. Cook 1–2 minutes more, until juicy but not wet. When you drag a spoon through the pan, liquid should not immediately pool in the gap.
- Keep the rolls connected and slice the slab horizontally. Put the bottom half in the dish. Layer with 3 cheese slices, the beef mixture, dry pickle slices and the remaining cheese.
- Replace the roll tops. Brush with melted butter and sprinkle with sesame seeds. Bake uncovered 12–15 minutes, until the cheese is fully melted and the tops are lightly golden. Loosely cover with foil if the tops brown too quickly.
- Rest 3–5 minutes. Cut along the roll seams and serve warm.
For the least-soggy bottoms, drain the beef thoroughly and pat the pickles dry. If the tops are browning before the cheese has melted, loosely cover the pan with foil. For make-ahead parties, prepare the beef in advance and assemble shortly before baking.
NoshParty recipes are carefully researched for clarity, practicality and real-kitchen use. Read about our recipe approach →
Never wonder what to bring again.
Get practical party recipes, seasonal ideas and crowd favorites delivered straight to your inbox.